GUI Application User Guide
1. Overview
After successful installation, open USB-Tec.com – Extender Administrator from your programs.
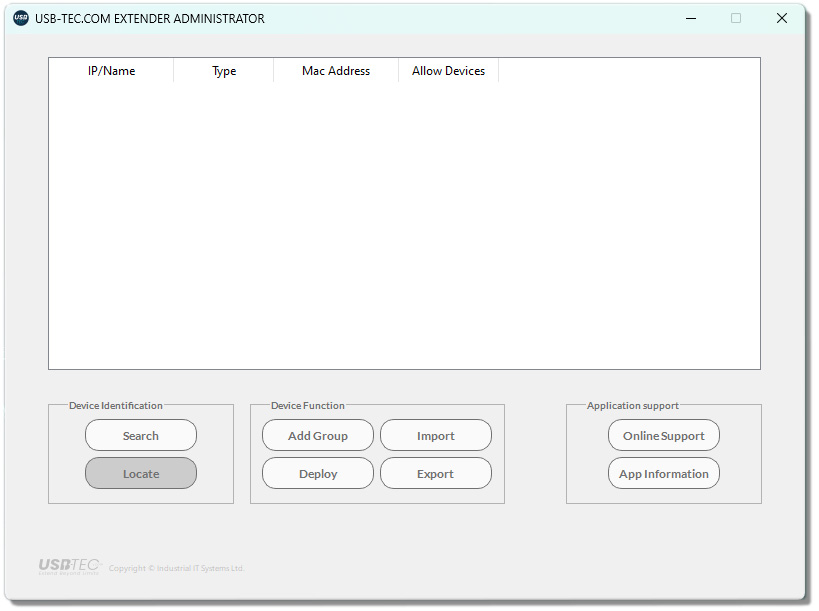
When the application starts, the following GUI screen displays (see Figure 1).
Controls
- Search: Find all USB-Tec extenders on your network.
- Locate: Trigger LED flashing on selected device.
- Add Group: Add a new group to your device table.
- Deploy: Deploy your pairing/group commands on all devices.
- Import: Import a saved device table csv file.
- Export: Save a device table csv file to you local PC.
- Online Support: Access the online support page.
- App Information: View application version.
Device Table
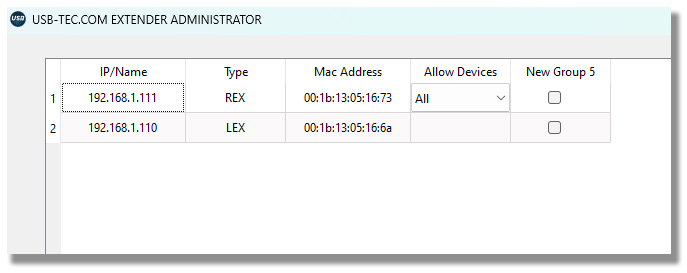
Successful search of devices will populate the device table, with IP, device Type and Mac address of each device within the local subnet (see Figure 2).
2. Device Management
Devices will be assigned IP address from your Local Area Network DHCP when they are connected and powered on unless they have been previously assigned a static IP.
Search for Devices
After loading the application onto your Windows PC, trigger the Search to find all USB-Tec devices. These will then display on the Device table, displaying IP and Mac addresses.
Rename Device
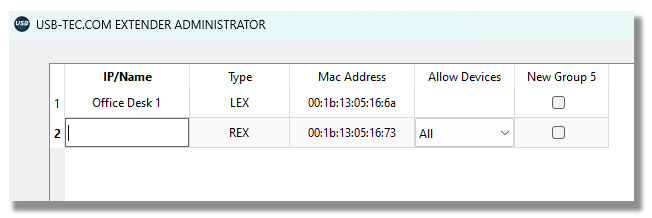
Devices can be renamed on the Device Table to make managing multiple devices and groups easier. This renaming is only saved to your application device table (tied to Mac address) and does not save to devices directly.
To rename a device, click on the IP field to update the text field (see Figure 3).
Locate Device
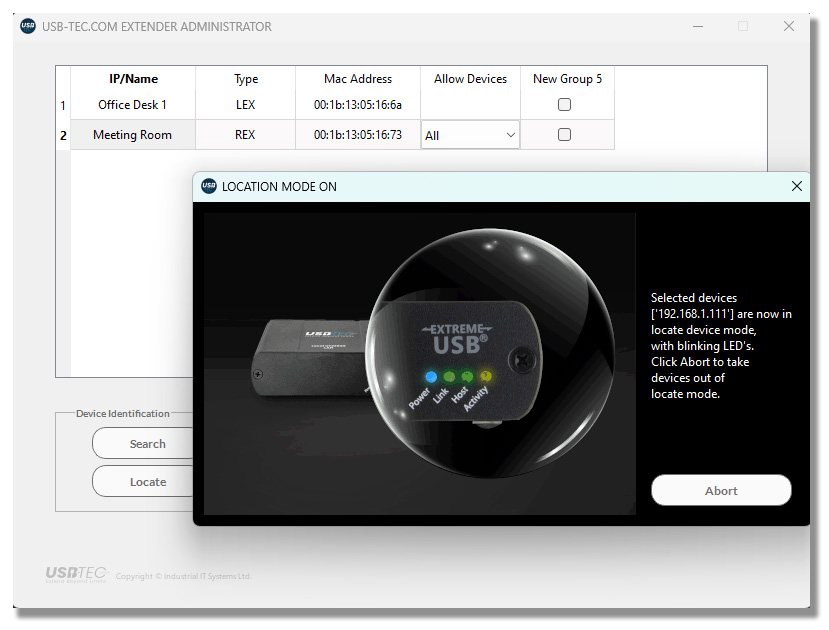
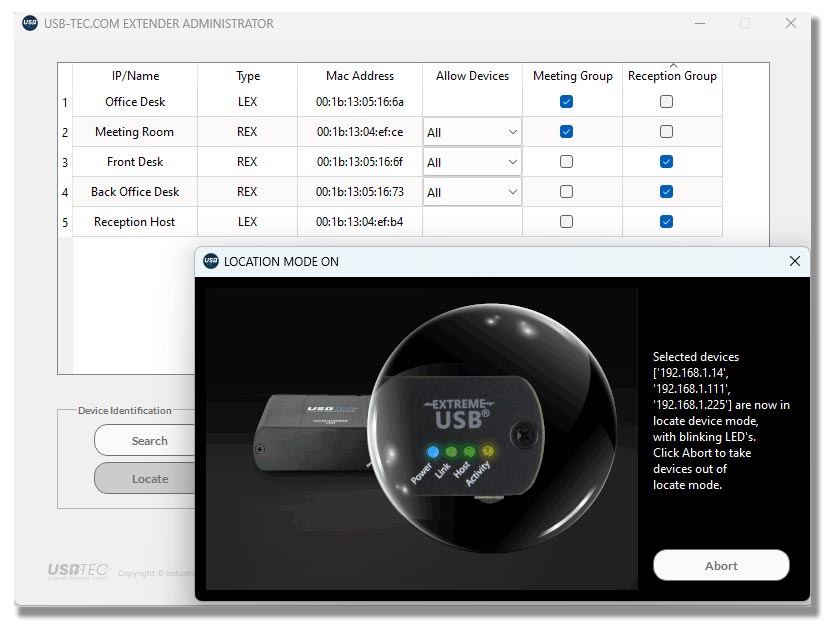
To support identifying each physical device across your LAN, you can trigger the front LEDs to flash. With multiple devices over your LAN, this can be used to ensure identifying correct device before deploying parings.
Select device, and press Locate to trigger LEDs which will remain active until you have closed the trigger.
Once identified, you can abort the location mode (see Figure 4) for the selected device.
3. Group Management
USB-Tec devices can be grouped in pairs, or for Simultaneous interactions groups of one Local and up to seven Remote devices.
Rename Group
Right click on the device group header to open the drop-down menu, select Rename group to open the rename controller, entering your new group name (see Figure 5 and 6) clicking Ok to save.


Add Group
You can add more groups to the device table from the Add Group button below the Device Table. There is no limit to the number of groups you can add, the table will produce a side scroller.
Delete Group
You can delete a group from the device group header to open the drop-down menu (see Figure 5).
Locate Group
After deploying group configurations to device, triggering LEDs on all devices in a group for easy identification from the device group header to open the drop-down menu (see Figure 5) selecting Locate Group devices (see Figure 7) .
4. Device Class Filtering
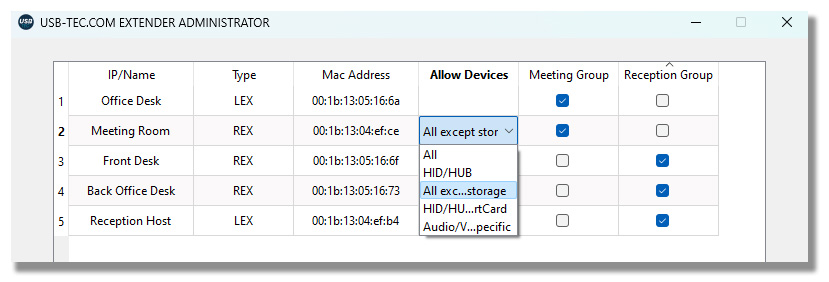
USB-Tec devices are enabled with USB Device Class Filtering, allowing you to control or limit selective device classes from accessing the host machine over the extension.
Class filtering is available on Remote devices, enabling a filtering strategy based on the location of each Remote extension.
Available filtering Strategy options
- Allow all devices (default)
- Block all devices except HID and hub
- Block mass storage devices
- Block all devices except HID, hub, and smartcard
- Block all devices except audio and vendor specific
Choose Remote Class Filter
Allow Devices column is selectable option (see Figure 8) on Remote devices, select from the drop down each devices configuration and deploy to pass command through to each device.
5. Deployment Configuration
USB-Tec application works by passing commands from your device table to each specific device, configuring the pairs and groups. Each device then receives instruction on which other devices to connect with.
- Groups must have at least one Local and one Remote device.
- Groups cannot have more than seven Remote devices.
- Groups cannot have more than one Local device.
- Devices cannot be assigned to more than one group.
Deploy Groups
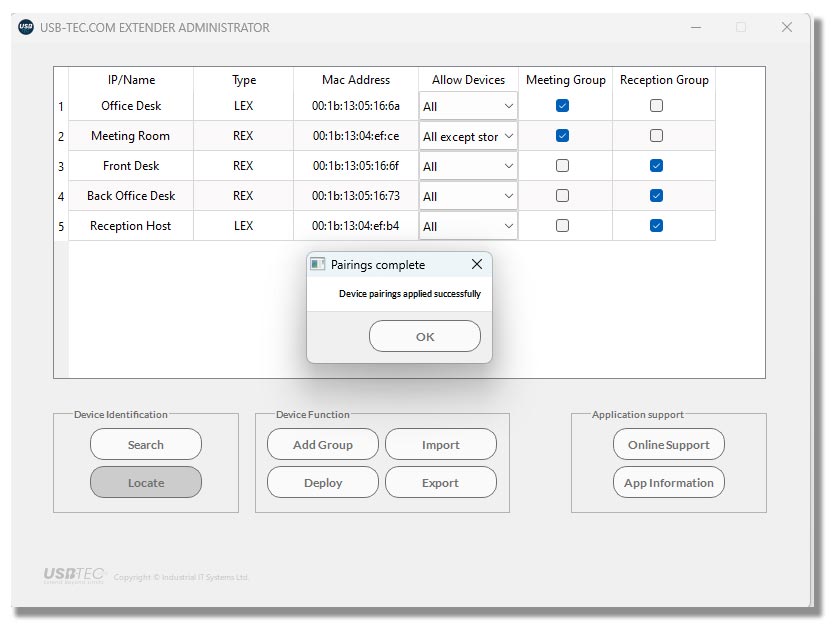
Configure groups by selecting checkboxes for your required configuration and select Deploy button below the table.
Confirmation of your deployment will appear on screen.
6. Saved Table
Device Table configuration can be saved locally as a csv file, allowing you to save multiple configuration files for quick deployment in different scenarios.
Export Table
Select Export to open your computer save file process and save to local machine.
Import Table
Select Import to open your computer load file process and select stores csv file and open.
7. Troubleshooting
Can’t Find A Device
When adding new devices to your LAN, it can take a little time to request and assign IP address from your DHCP. Try search again after a minute to detect devices.
Manual Device Pairing
Devices can be manually paired over your LAN.
Hold mode button on the back of each device for 5 seconds to trigger the device to search the network. When a Local and a Remote device are both set to search, they will connect and pair.
